
Fuel Gauge Fault
Been working on this on and off for a while now. The fuel gauge wouldn’t move and
the display would give “Fuel Gauge Fault”. Using the diagnostics I could read the
fuel level via the BECM -
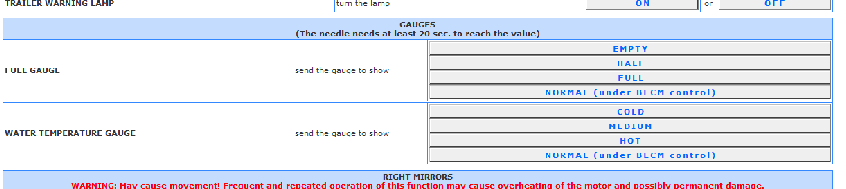
Also on the diagnostics you can command the gauges to certain positions -
So I came to the conclusion that the binnacle was faulty and kept an eye out for a replacement.
Using the Diags to test the Gauges:
Warning
You have to be careful. If you fit a 2nd hand unit which has got a higher mileage
than your car, it will overwrite the mileage in the BECM with the higher mileage
from your replacement binnacle -
This means you have to ask the seller the mileage of the binnacle before you buy it to ensure its lower than yours. Unfortunately most were higher or the sellers didn’t respond or didn’t know the mileage.
I came across a brand new unit, which was in KM/H and left hand drive, but it was
£40 and local, so it seemed a worthwhile purchase to see if I could swap things around
to make one good unit. (A brand new unit will inherit the mileage from the BECM -
I started by simply plugging the left hand drive unit into the car and seeing what
happened. It displayed “odometer” error -
Unfortunately the new unit also showed “Fuel gauge fault” -
From Rave:
When the fuel tank level is low (E”), the resistance value of the gauge sensor is 270Q for petrol and diesel engines. As the fuel level increases, the resistance of the sensor decreases. When the fuel tank is full, the resistance value of the sensor for petrol engines is 19 ohms and for diesel engines 25.8 ohms. When the fuel gauge sensors resistance value increases to 175 ohms (9 liters / 2.25 US gallons, the low fuel warning light will illuminate to warn of the fuel status.
Connector Pin out:
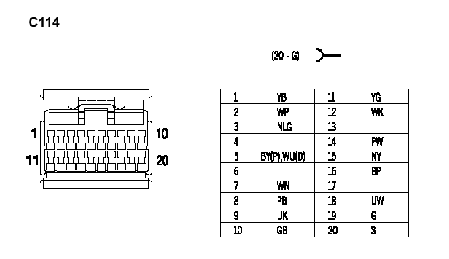
Pin 10 (Green with Black stripe) is the one we are interested in. Remove the plastic cover under the drivers seat to access the BECM and remove C114 connector.
Using a DVM on ohms range, I tested the circuit and to my surprise it was open circuit.
So I had a Rummage around in my electronics box and found a 25 ohm resistor -
I turned the ignition on and instantly the fuel gauge lept up to almost full. So this confirmed that I did have a problem with the sender and I hade been chasing my bum looking at the instrument binnacle. Grr...
Fuel tank removal
I had been desperately trying to avoid removing the fuel tank, even though Internet searches suggested that's where I should of started in the first place.
The official procedure to access the pump and sender is to remove the tank. There
are details on this page showing how to cut an access hatch in the floor under the
rear seats to access the tank. I pondered this for a short while and then decided
against it -
Lowering the tank enough to gain access turned out to be reasonably straight forward
-
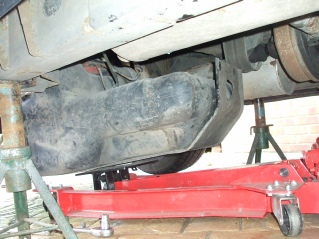
Disconnect the car battery and make sure you have a fire extinguisher close by.
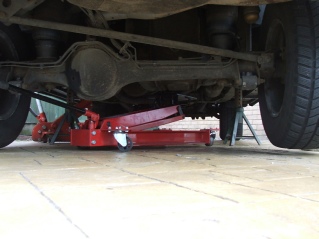
Jack the rear of the car up and support with axle stands. I have a gearbox jack which provides a very mobile and stable platform to support the tank. Assuming your tank is pretty empty (highly recommended) you could get away with a normal jack with a piece of wood attached to it.
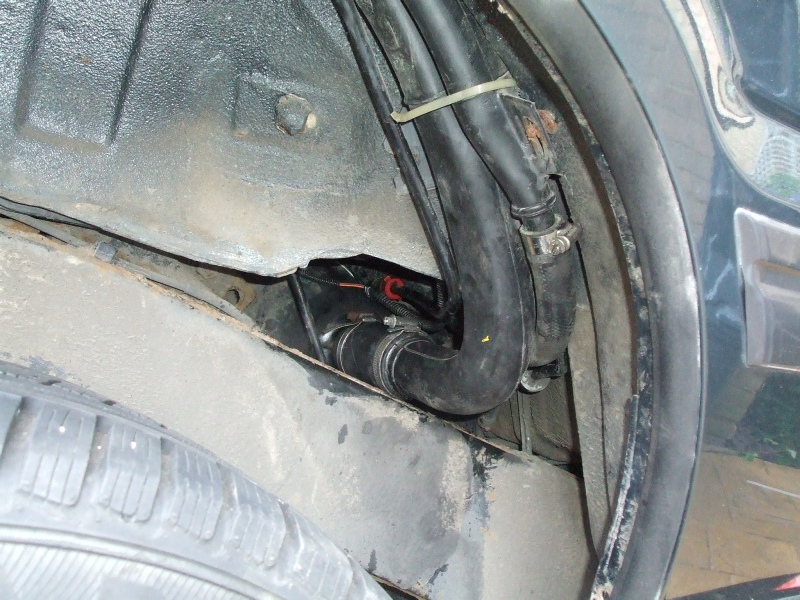
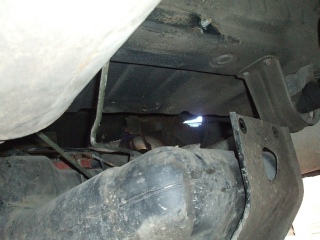
Remove the offside rear inner wheel arch liner. You will see a cable that leads to
the fuel tank -
Undo the two jublie clips holding the filler neck to the tank and also remove the 30mm breather hose.
If you intend to remove the entire tank -
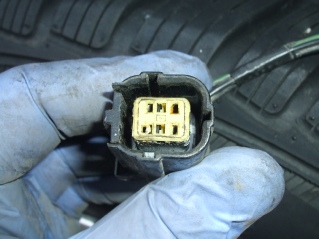
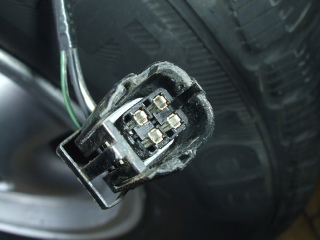
With the tank dropped down I was able to reach in and disconnect the plug. Immediately I noticed that the connector was damaged. Looks like it was forced on and the pin when in the wrong direction. So I cleaned it all up and also straighted out the male end on the tank. I then carefully refitted the connector.
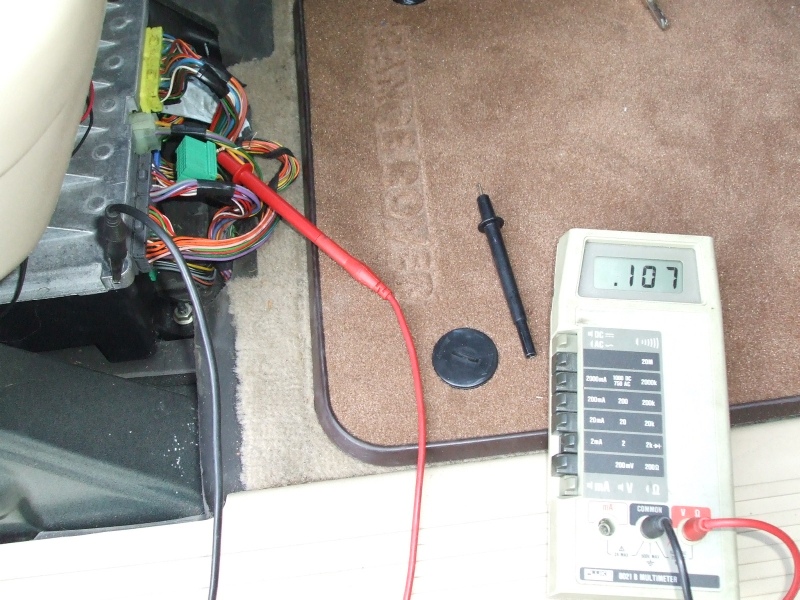
With my DVM between pin 10 and ground I saw 107 ohms -
DVM showing 107 ohms (Shows .107 as its on the 2K Range)