
Temperature monitoring in Homeseer with Dallas 1 Wire Part two
Here are some screen shots of a working Dallas 1-
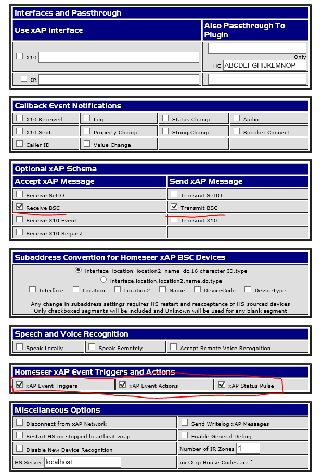
This is a screen shot of the DS9490 XAP connector.
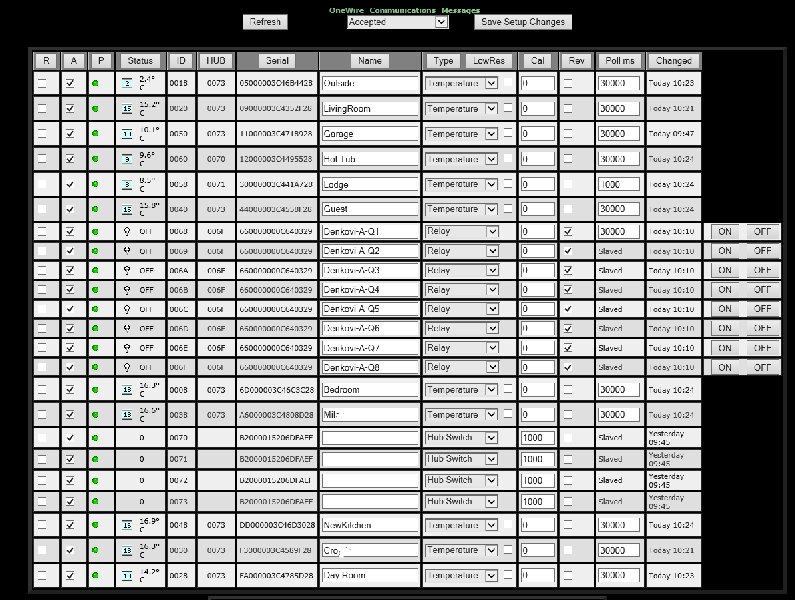
The serial number is unique to every single 1-
I have 9 devices around the house.
The name, such as “bedroom” is the name that the device will have in Homeseer. I changed the poll to 30 seconds as I didn’t see any need for it to be faster.
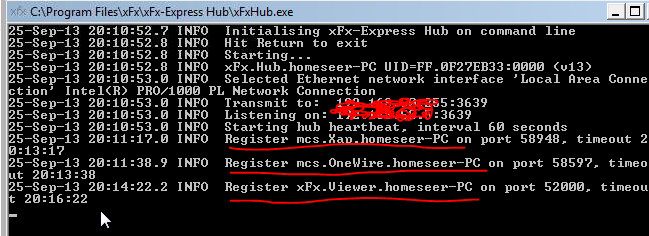
I did try Michael’s Hub service but it wouldn’t work, so I tried xFX hub by Edward Pearson which also runs as service, but you can also run it from a command prompt if you want to see what’s going on:
If you run the console version -
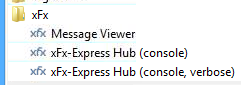
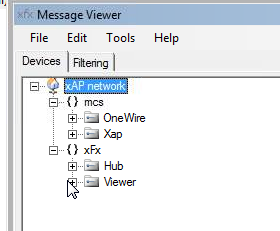
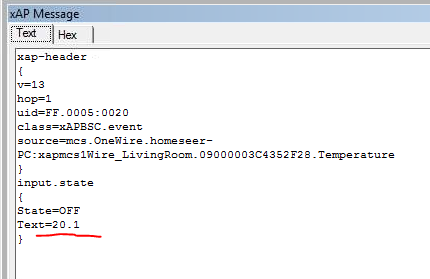
Edward also wrote the XAP message viewer which is very handy for capturing and viewing XAP messages. If you are running it on a different PC, you will also need to install an XAP hub. If its on same PC as everything else (as in my case) run launch it:
Here’s my basic explanations of what you are looking at (as I didn’t get it at first)
At the top level you see the different “Vendors” (my term), One being “XFX” (Edward Pearson) and the other “mcs” (Michael McSharry).
The next level down is the connectors that it can see:
For mcs we can see Michael's OneWire connector and his Xap homeseer plugin
For xFX we see Edwards Hub and his viewer (the tool we are using)
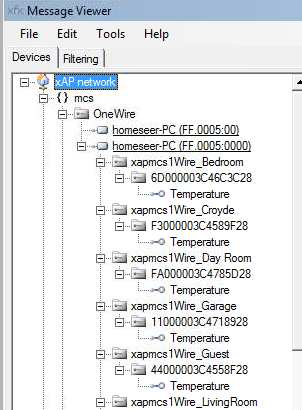
Drilling down onto the OneWire connector we can see all the messages being transmitted from my sensors on the XAP network.
Its the MCS Homeseer plugin that listens and processes these messages into Homeseer.
Every XAP device sends out periodic heartbeats -
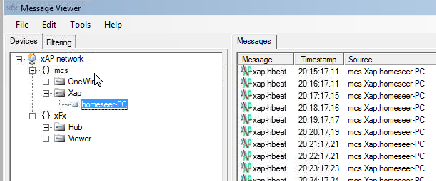
Clicking on one of the messages from the 1-
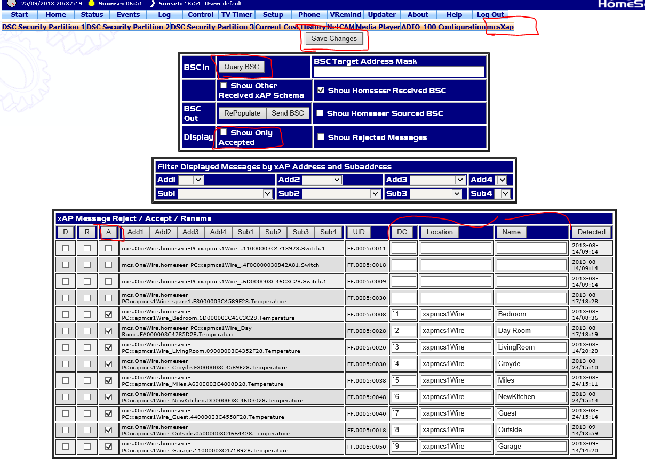
Here’s what the plugin looks like in Homeseer -
Hopefully my screen shots will serve as a reference of a working system. The documentation
says click “show only accepted” but on a new system where you haven’t accepted anything
yet (Clicking on the “A” column) -
When a new device appears simply tick the “A” checkbox and click save changes at
the top. The plugin will populate the “DC” (device code), Location and Name automatically
-